Manage labels for guests and reservations
- Labels make important information visible directly in the reservation list and floor plan
- Reservation labels relate to a single reservation and can be assigned manually or automatically via a shift
- Guest labels remain saved in the guest profile and can be used for future reservations as well as for segmentation
With labels, you can quickly highlight important information about guests and reservations to support your team in their daily work.
In foratable, there are two types of labels:
- reservation labels
- Guest labels
Prefer a video?
→ To the webinar: Labels for guests and reservations
A. What is the difference between reservation labels and guest labels?
reservation labels
Reservation labels relate to a specific reservation.
They are suitable for information that is only relevant for this one visit, for example:
- Birthday
- High chair
- Terrace
- Business lunch
After the visit, the label is not automatically linked to the guest profile.
Guest labels
Guest labels relate to the guest themselves.
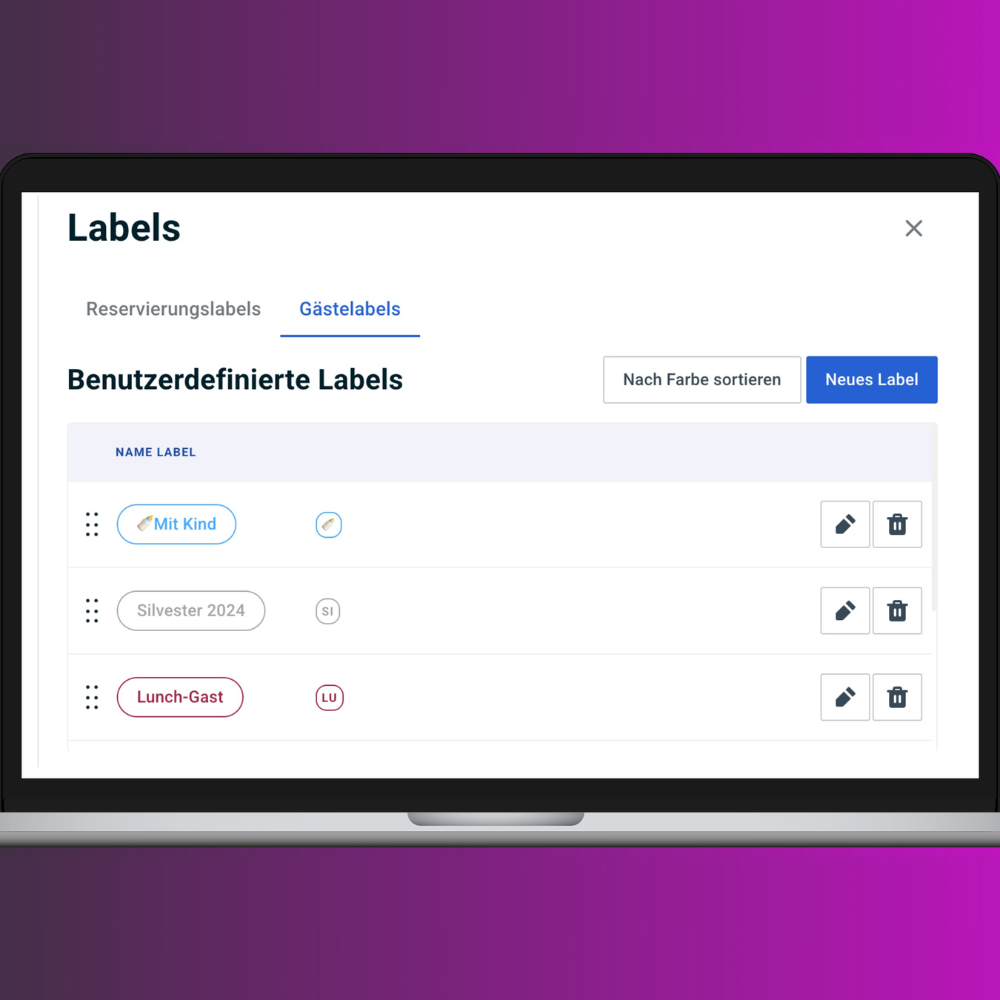
They remain saved in the guest profile and are therefore available again for future bookings.
Examples:
- Regular guest
- VIP
- Blacklist
- Business guest
- Allergy
- Wine lover
- Family
- Lunch guest
The labels VIP and Blacklist are available by default. You can also create additional custom guest labels.
B. Creating and managing labels
Open Configuration → Labels to access label management.
There, you will find two tabs:
- reservation labels
- Guest labels
Select the appropriate section and click on the top right: New label.
You can then:
- assign a name
- optionally use an emoji
- choose a color
- save the label
For example:
- 🎂 Birthday
- High chair
- Regular guest
- VIP
Via custom colors you have access to the full color palette.
Colors help your team identify important information more quickly.
You can also:
- sort by color
- reorder them using drag & drop
C. Using reservation labels
You can add reservation labels when creating a reservation or at any time afterwards.
To do this:
- Open the desired reservation.
- Click Labels.
- Select one or more labels.
- Save the reservation.
The selected labels will then appear in the reservation list.
Depending on your configuration, they can also be displayed directly in the floor plan.
This allows your team to see at a glance which reservations require special attention.
D. Automatically assigning labels via a shift
Reservation labels can also be assigned directly to a shift .
This is useful if you want all reservations for a specific shift to automatically receive the same label.
Example:
You have a dedicated shift for lunch service and assign the label Business lunch to it.
All reservations within this shift will then automatically receive this label.
This allows your team to see which service a reservation belongs to directly in the reservation overview or floor plan.
E. Using guest labels
You can add guest labels when creating a guest profile or at any time later.
They help you structure your guest database and keep track of important information over the long term.
The big advantage: the label remains linked to the guest profile.
If the guest makes another reservation, the information remains available to your team.
For example, you can immediately identify:
- whether it is a regular guest
- whether the guest is flagged as a VIP
- whether there is a known allergy
- whether it is a business guest
This allows your team to provide more personalized and targeted guest service.
F. Using guest labels for marketing and segmentation
Guest labels are also suitable for segmenting your guest database.
Using the filter function, you can specifically search for guests with certain labels and export the corresponding data for marketing activities.
For example:
- Inviting regular guests to a special event
- Informing business guests about a new lunch offer
- Inviting wine lovers to a tasting
This allows you to tailor your communication more effectively to different guest groups.
G. Best practices for your labels
To ensure labels are truly helpful to your team, you should define a clear structure from the start.
Establish clear rules
Discuss the following with your team:
- When is a guest considered a VIP?
- When should a guest be marked as a regular?
- What information belongs to the reservation?
- What information should be permanently stored in the guest profile?
- Which labels should be automatically assigned to a shift?
This prevents different team members from using the same labels in different ways.
Less is more
It is better to create a few clearly defined labels than many similar variations.
Start with the labels your team actually needs on a daily basis and expand them later if necessary.
Use short names
A good label should be understandable at a glance.
Examples:
Good:
Birthday, high chair, regular guest, business lunch
Less helpful:
Guest is celebrating their birthday today, might need a high chair
Use colors intentionally
Colors can help your team process information more quickly.
For example, you can define your own color system.
The most important thing is that the meaning of the colors remains clear and consistent for your entire team.
Review labels regularly
Take time regularly to review your existing labels.
Ask yourself:
- Are all labels still being used?
- Are there any duplicate or very similar labels?
- Are any important categories missing?
- Does the entire team understand what they mean?
This is how you keep your label system clear and useful.
Our recommendation
Labels work best when they are not just set up technically, but are used consistently by the team.
Define early on which labels you use and what they stand for.
The cleaner your label system is, the faster your team can identify important information – and the more personal your guest service can be.