2nd onboarding
- You will record and process reservations, assign tables, and check guests in and out
- You will learn how to no-shows, recurring reservations, shift blocks, and service notes manage
- With Inbox, feedback, and insights help you keep track of important activities and developments
You have the first training session already completed – congratulations!
In the second training session, you will learn the most important features for your daily work with foratable.
The goal is for you and your team to be able to manage reservations independently and control service directly via the reservation book.
Goals of the second training session
After this onboarding, you will be able to:
- Record reservations
- Cancel reservations and mark no-shows
- Create recurring reservations
- Understand the reservation overview
- Assign tables
- Check guests in and out
- Block shifts
- Add service notes
- use the inbox
- use table labels
- manage feedback
- view insights
- switch between different reservation views
A. Creating reservations
- Switch to the desired day.
- Click on the green plus.
- Select the time and number of guests.
- First, search for the guest to check if a guest profile already exists.
- If the guest does not exist yet, create a new profile.
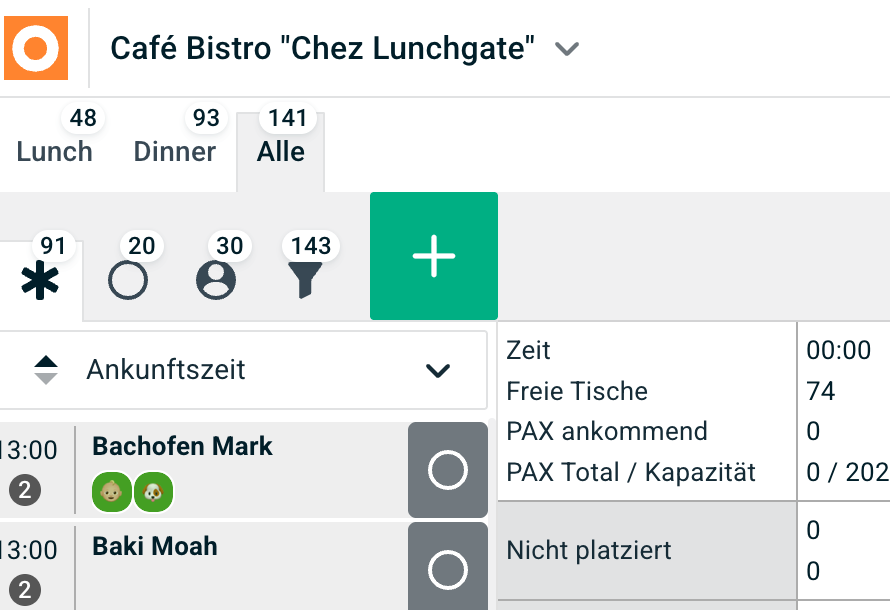
We recommend entering at least the following information:
- First name
- Last name
- Phone number
Then click on Save.
If an email address and phone number are available, you can choose whether the reservation confirmation should be sent via email or SMS.
B. Canceling reservations or marking them as a no-show
- Open the desired reservation.
- Click next to Save on the arrow.
- Select:
- Cancel reservation
- orNo-show
This ensures that what happened to the reservation remains traceable later on.
C. Create a recurring reservation
You can create a series of reservations for regular guests.
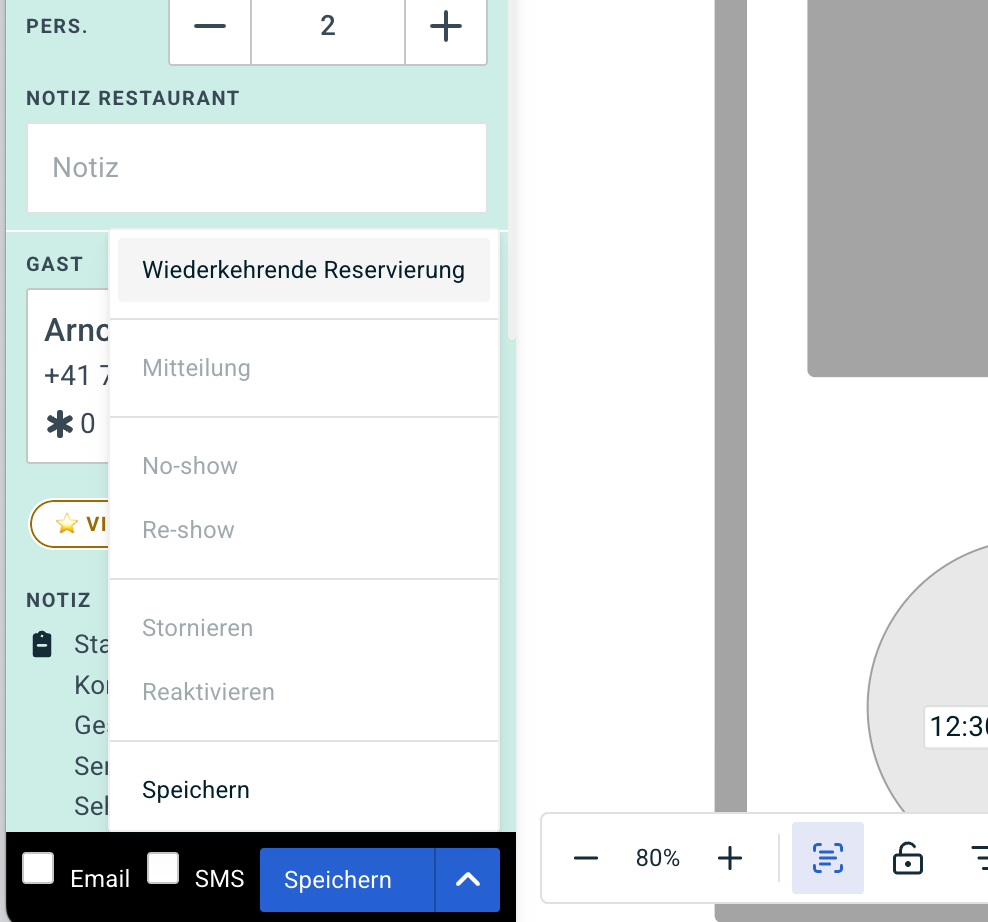
- First, create a new reservation.
- Click next to Save on the arrow.
- Select Recurring reservation.
- Enter the required details.
You can define:
- the start and end dates for the series
- how often the reservation repeats, for example every 7 days
Then save.
When assigning tables, you can also specify whether the same table should be used for all future reservations.
D. Understanding the reservation overview
You can find all reservations on the left side of your reservation view.
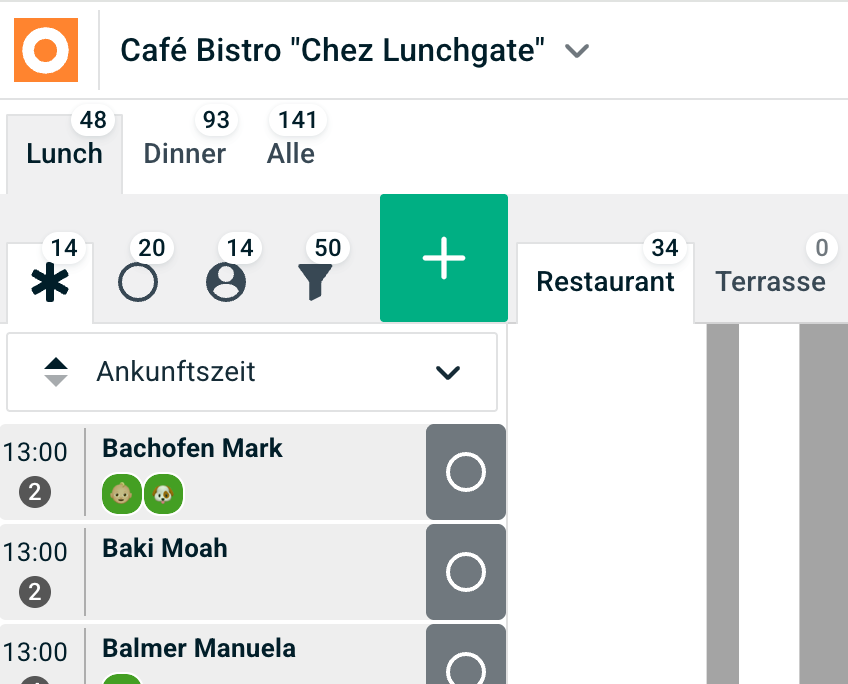
The various icons help you quickly identify the current status:
- Star: new reservation without table assignment
- Circle: reservation with table assignment
- Person: guest is checked in
- Filter: show further reservations, for example cancelled reservations
E. Assign table and check guests in or out
Assign table
- Click the star icon in the overview.
- Click the circle icon next to the reservation.
- Select the desired table in the floor plan.
The reservation is now assigned to a table.
Change table
You can reassign a reservation in two ways:
Via drag & drop
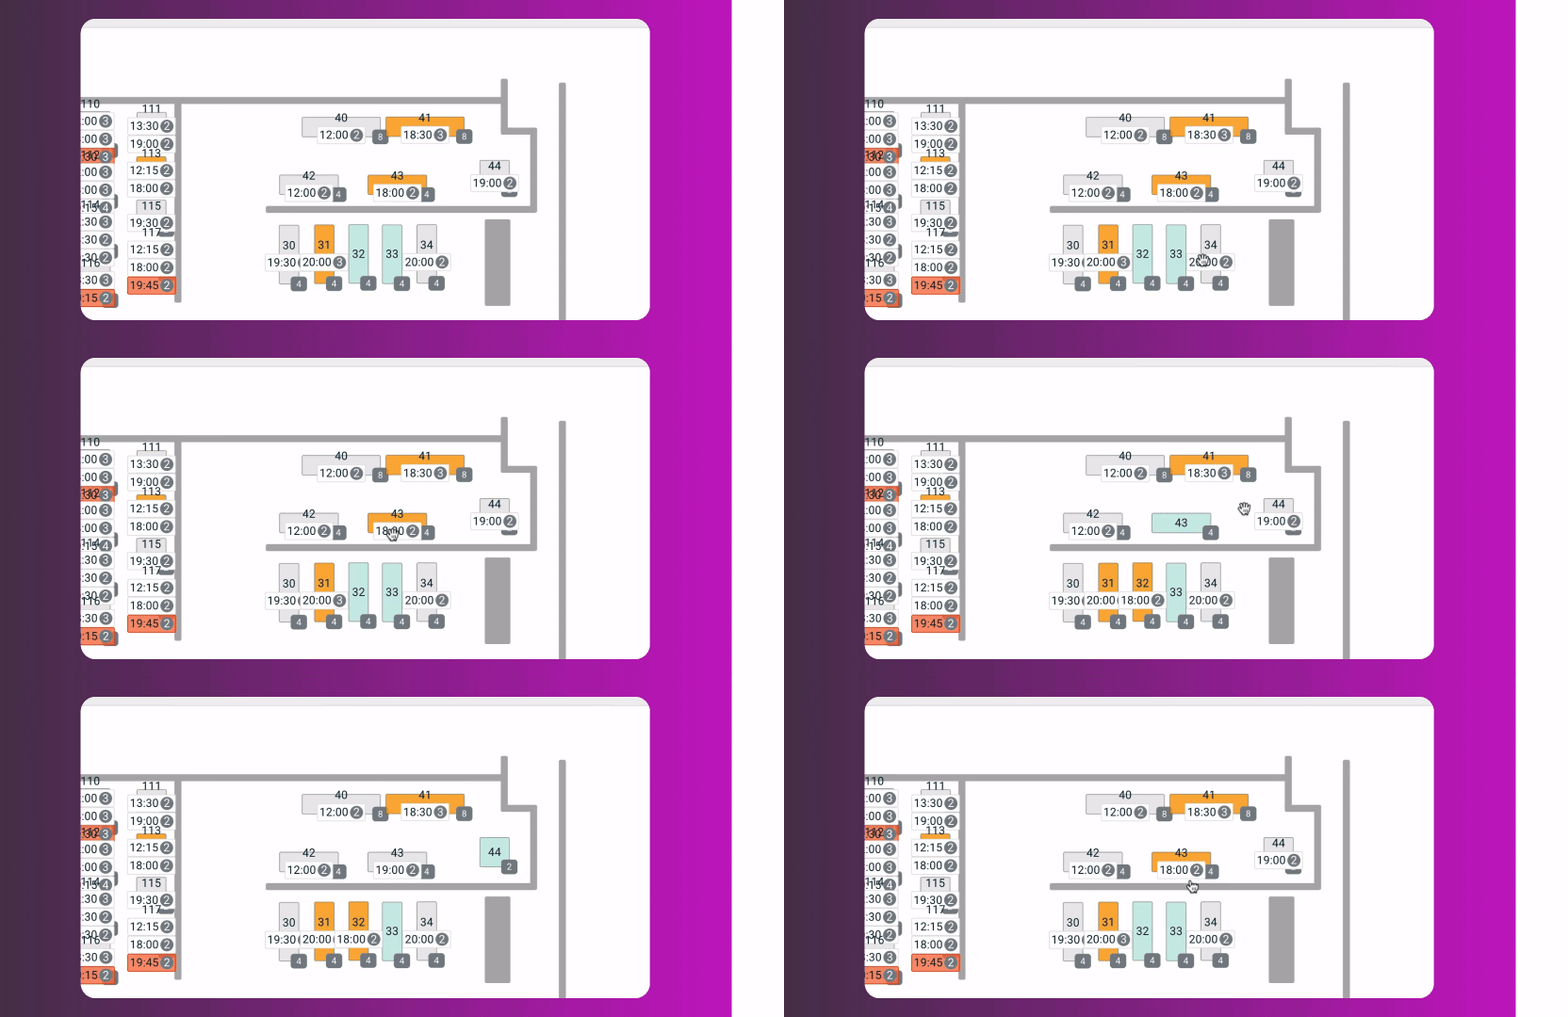
- Click on the reservation in the graphical floor plan.
- Drag it to the desired table.
- Drop it there.
The reservation is moved directly to the new table.
Alternatively via the reservation
- Open the reservation.
- Select the desired new table.
- The reservation has been moved.
Check in guest
Once the guest arrives at the restaurant:
- Click the circle icon in the overview.
- Click the person icon next to the reservation.
- The guest is checked in.
The occupied table will be highlighted in orange on the floor plan.
Check out guest
When the guest leaves the restaurant:
- Click the person icon in the overview.
- Click the arrow next to the reservation.
- Check out the guest.
The table will then be available for other guests again.
F. Block shift
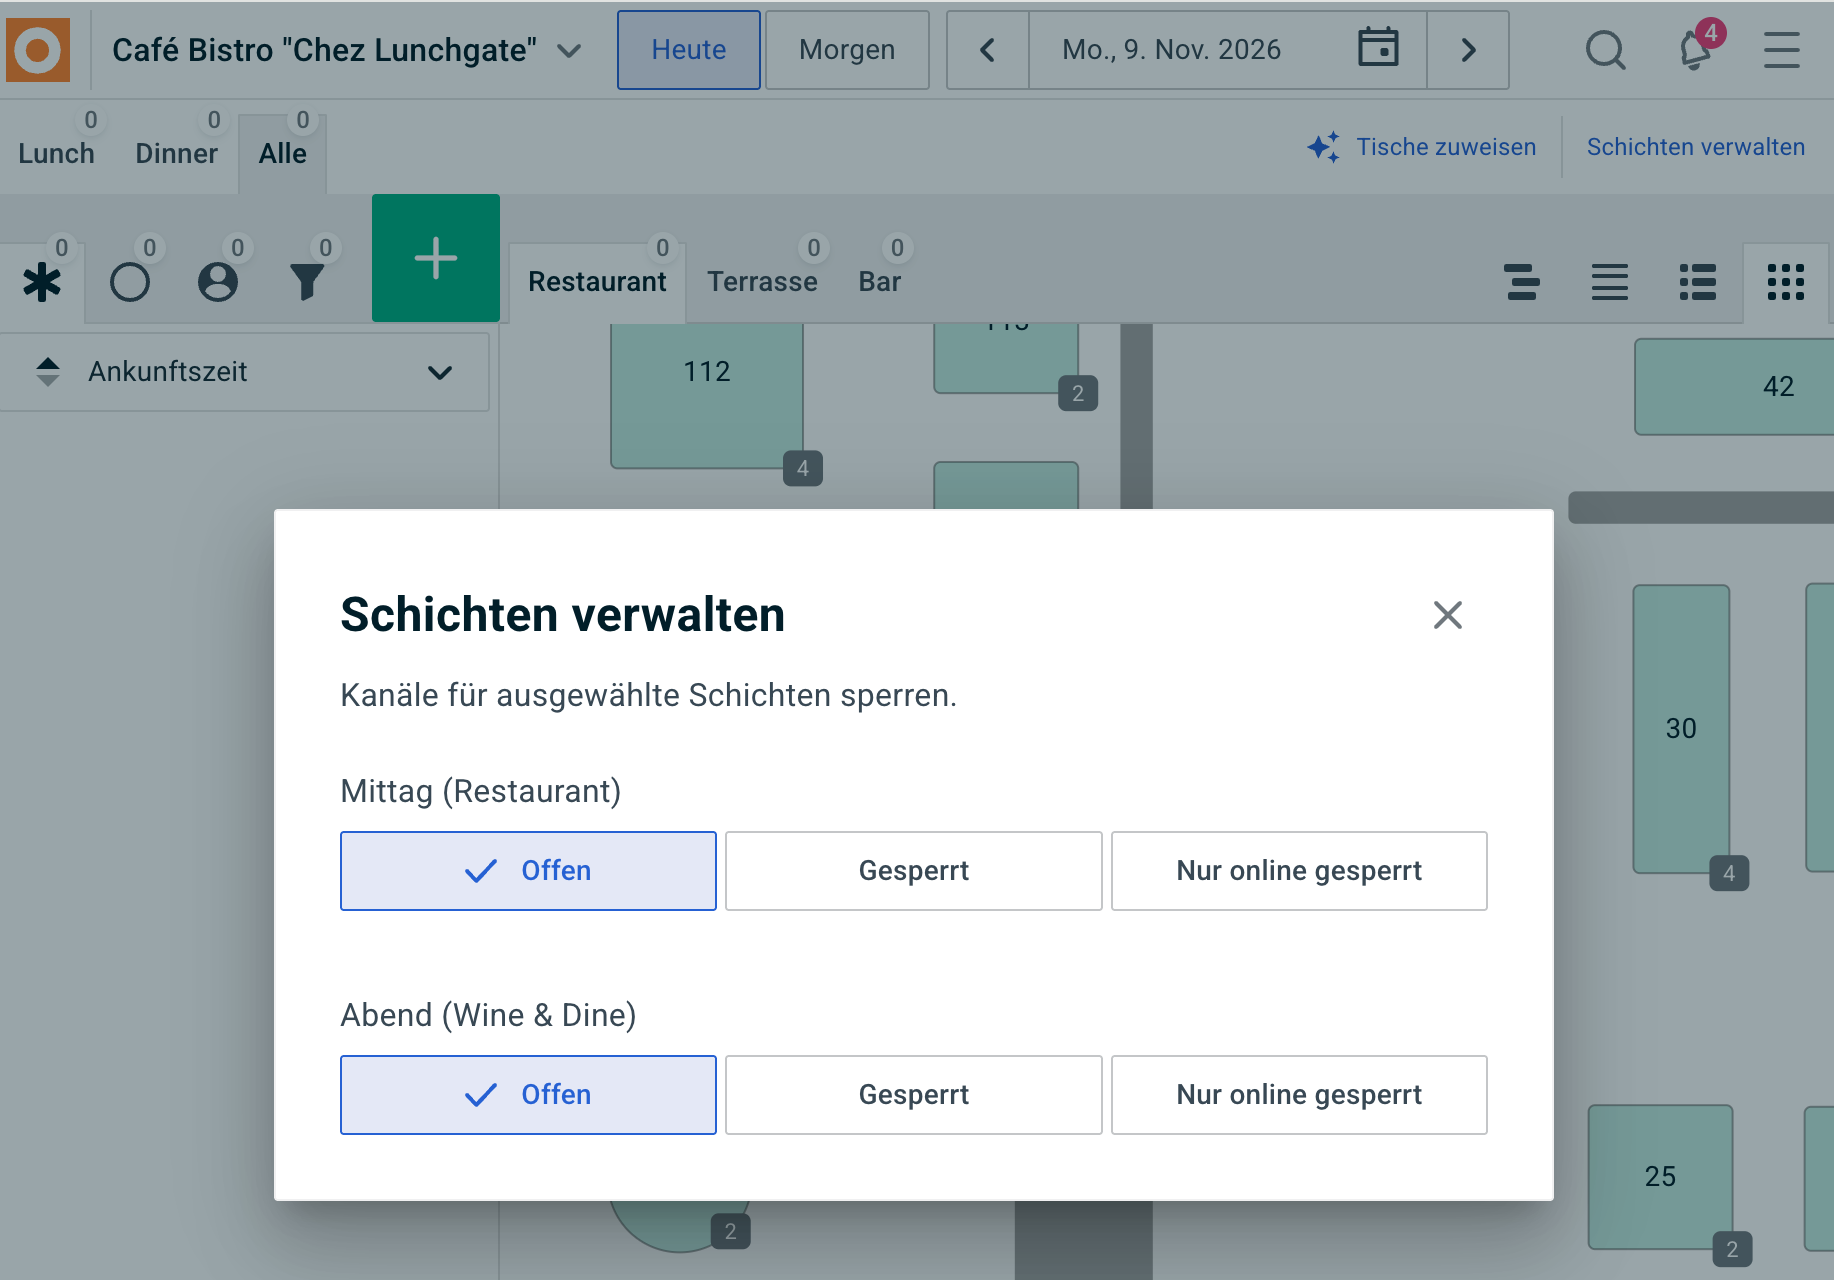
If you do not want to accept any further reservations for a specific service:
- Go to the desired day.
- Select the relevant shift, for example, lunch or dinner.
- Open Manage shifts (top right).
- Block the desired shift.
Important: If you only want to block a specific room, this must be done in the configuration under Configuration > Schedule .
G. Add service note
Service notes help your team highlight specific situations directly in the reservation book.
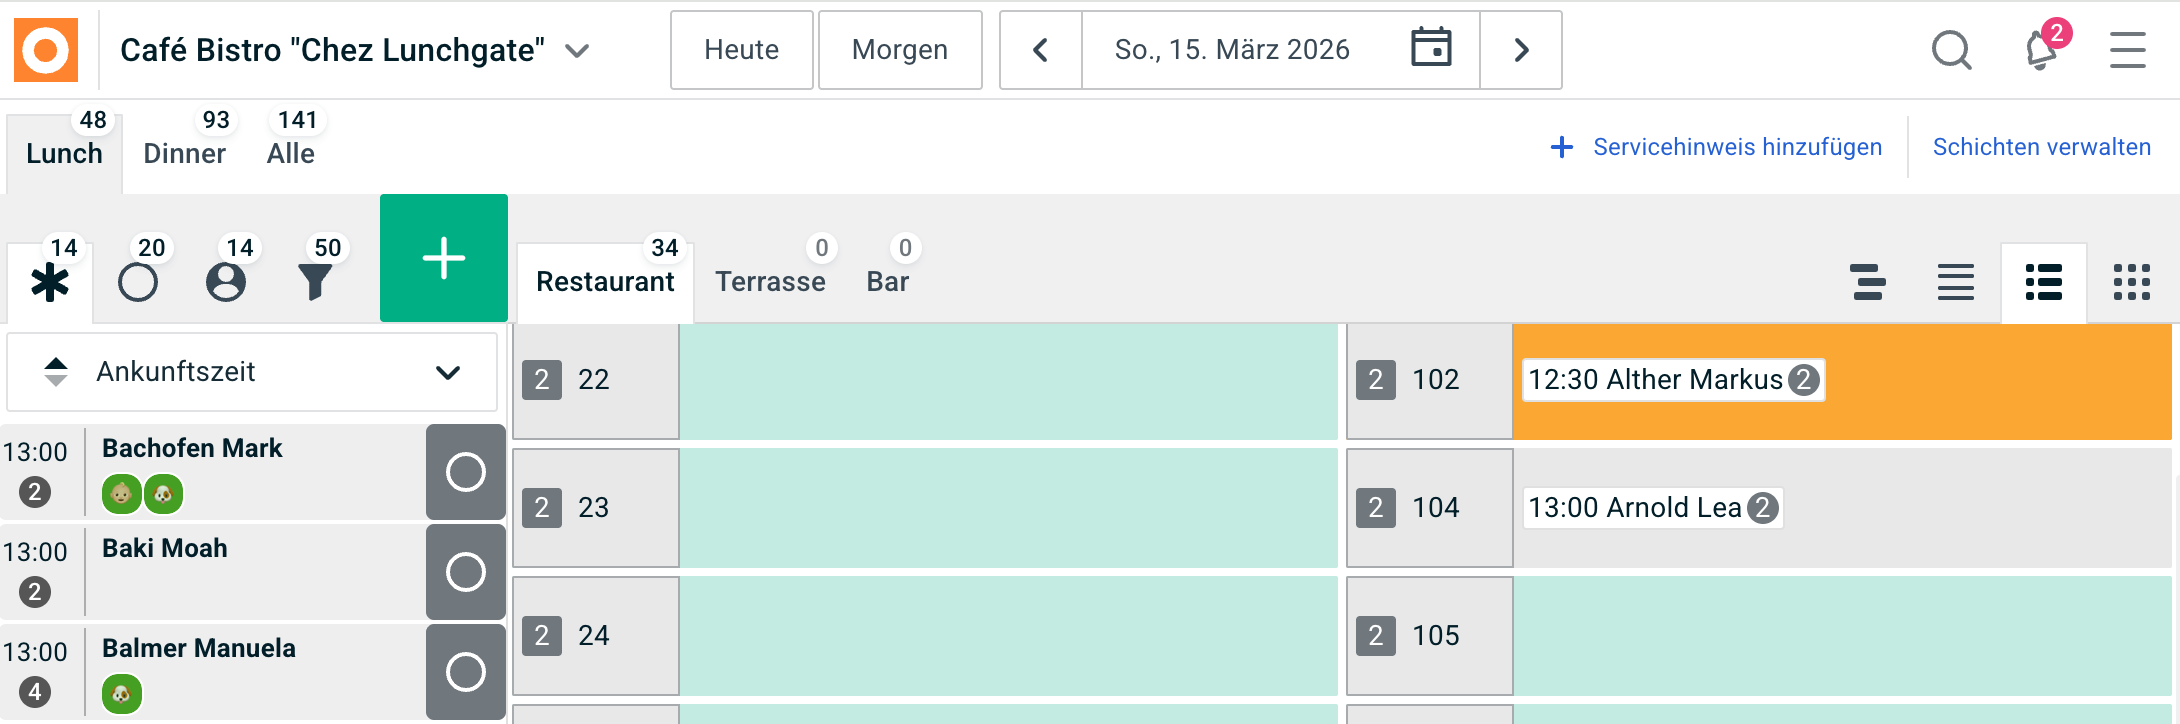
- Open the desired day and the corresponding shift.
- Select Add service note (top right).
- Enter the required information.
For example:
"Fully booked today – Head chef ill."
A service note applies only to the selected shift.
H. Inbox
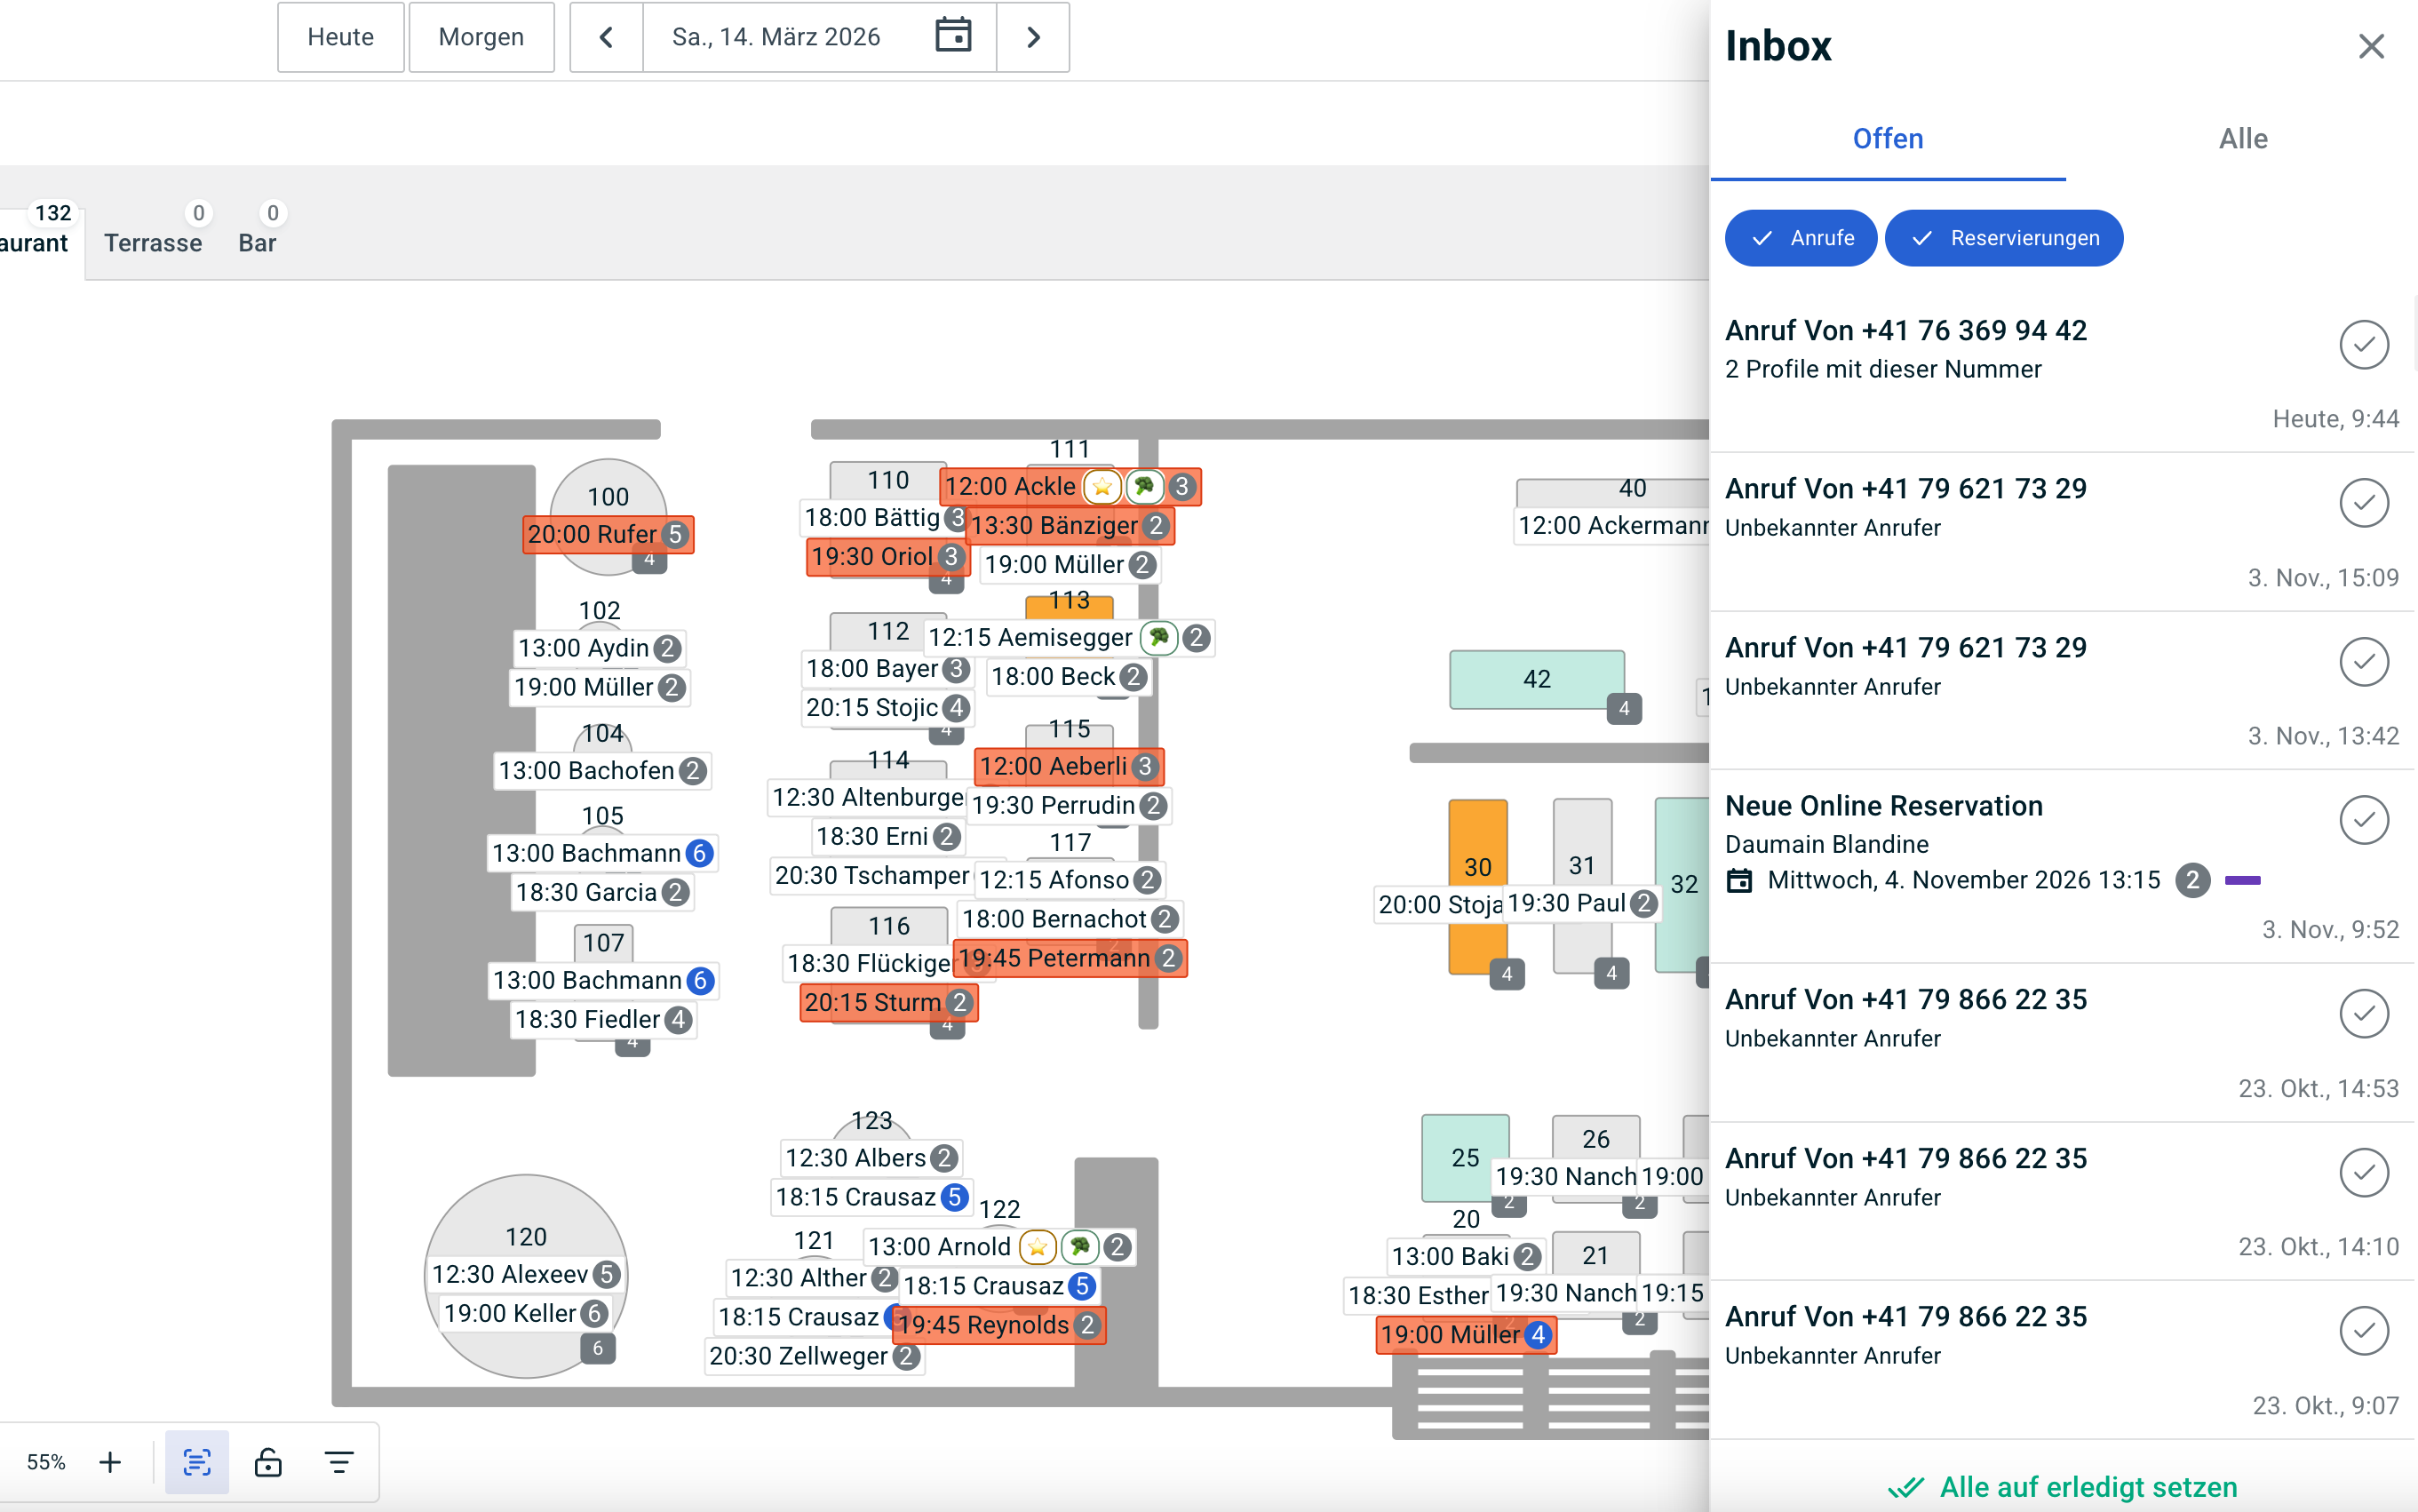
The inbox helps you keep track of relevant activities regarding your reservations. You can find it by clicking the bell icon in the top right corner of the reservation book.
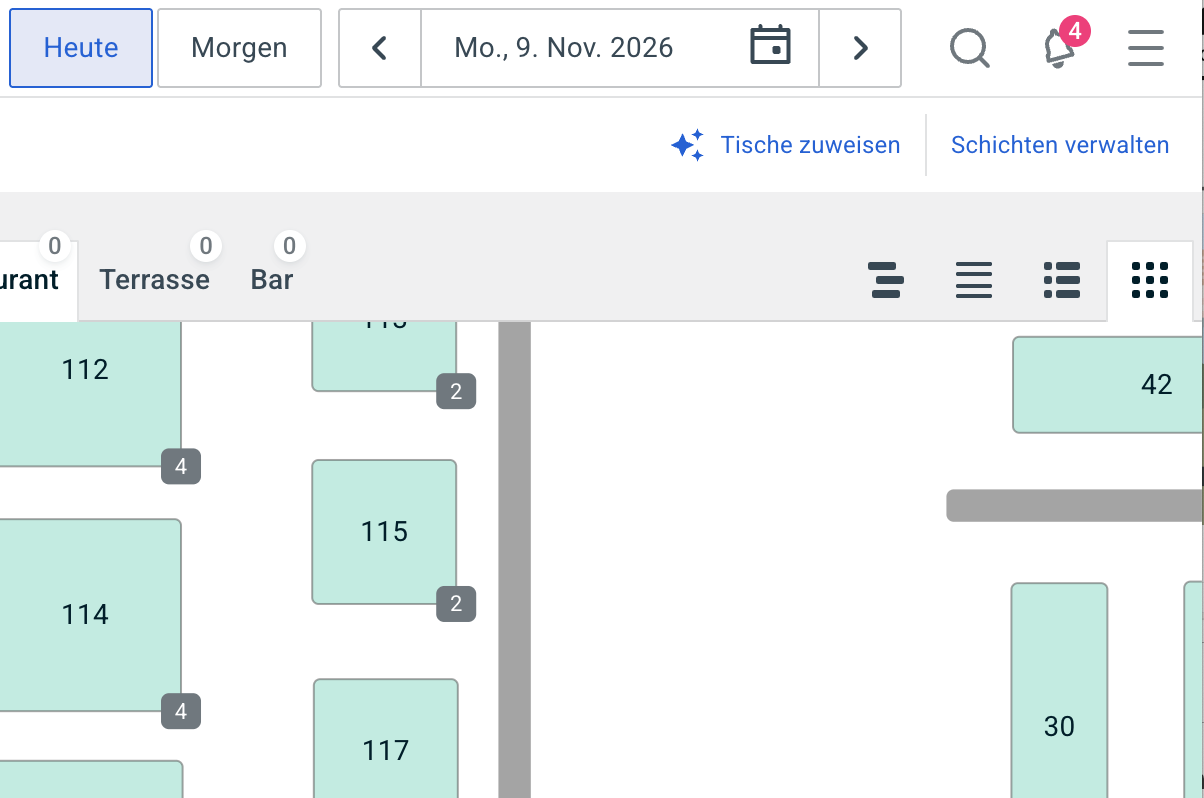
Check the inbox regularly so that pending requests can be handled promptly.
I. Table labels
Table labels allow you to add extra information to individual tables and make it visible to your team.
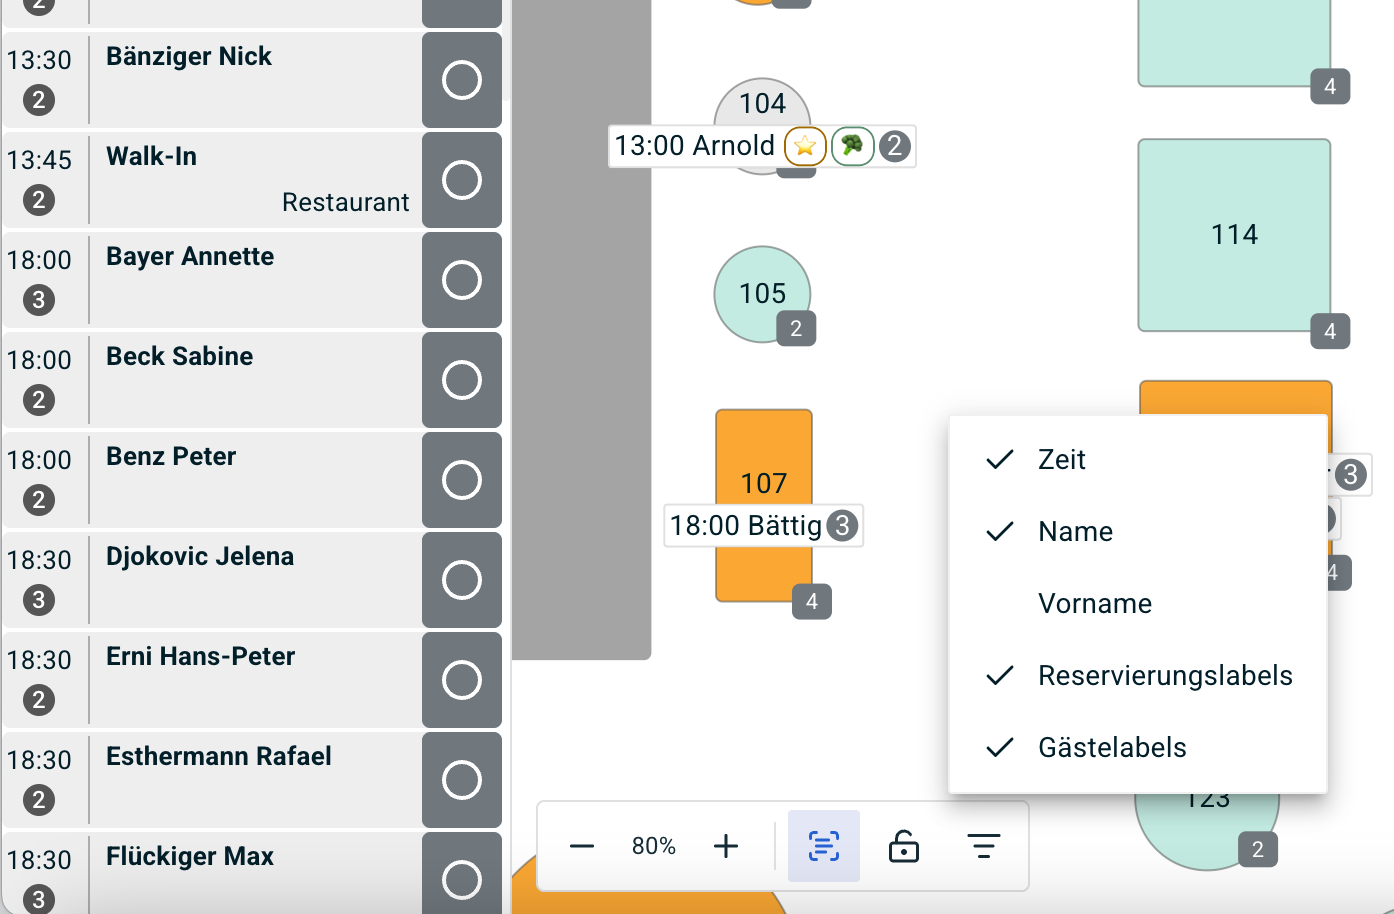
This makes it easy to quickly identify specific table features. The table labels you can find it in the bottom right of the reservation book, right next to the reservation list.
J. Feedback
With foratable, you can view guest feedback in one central location.
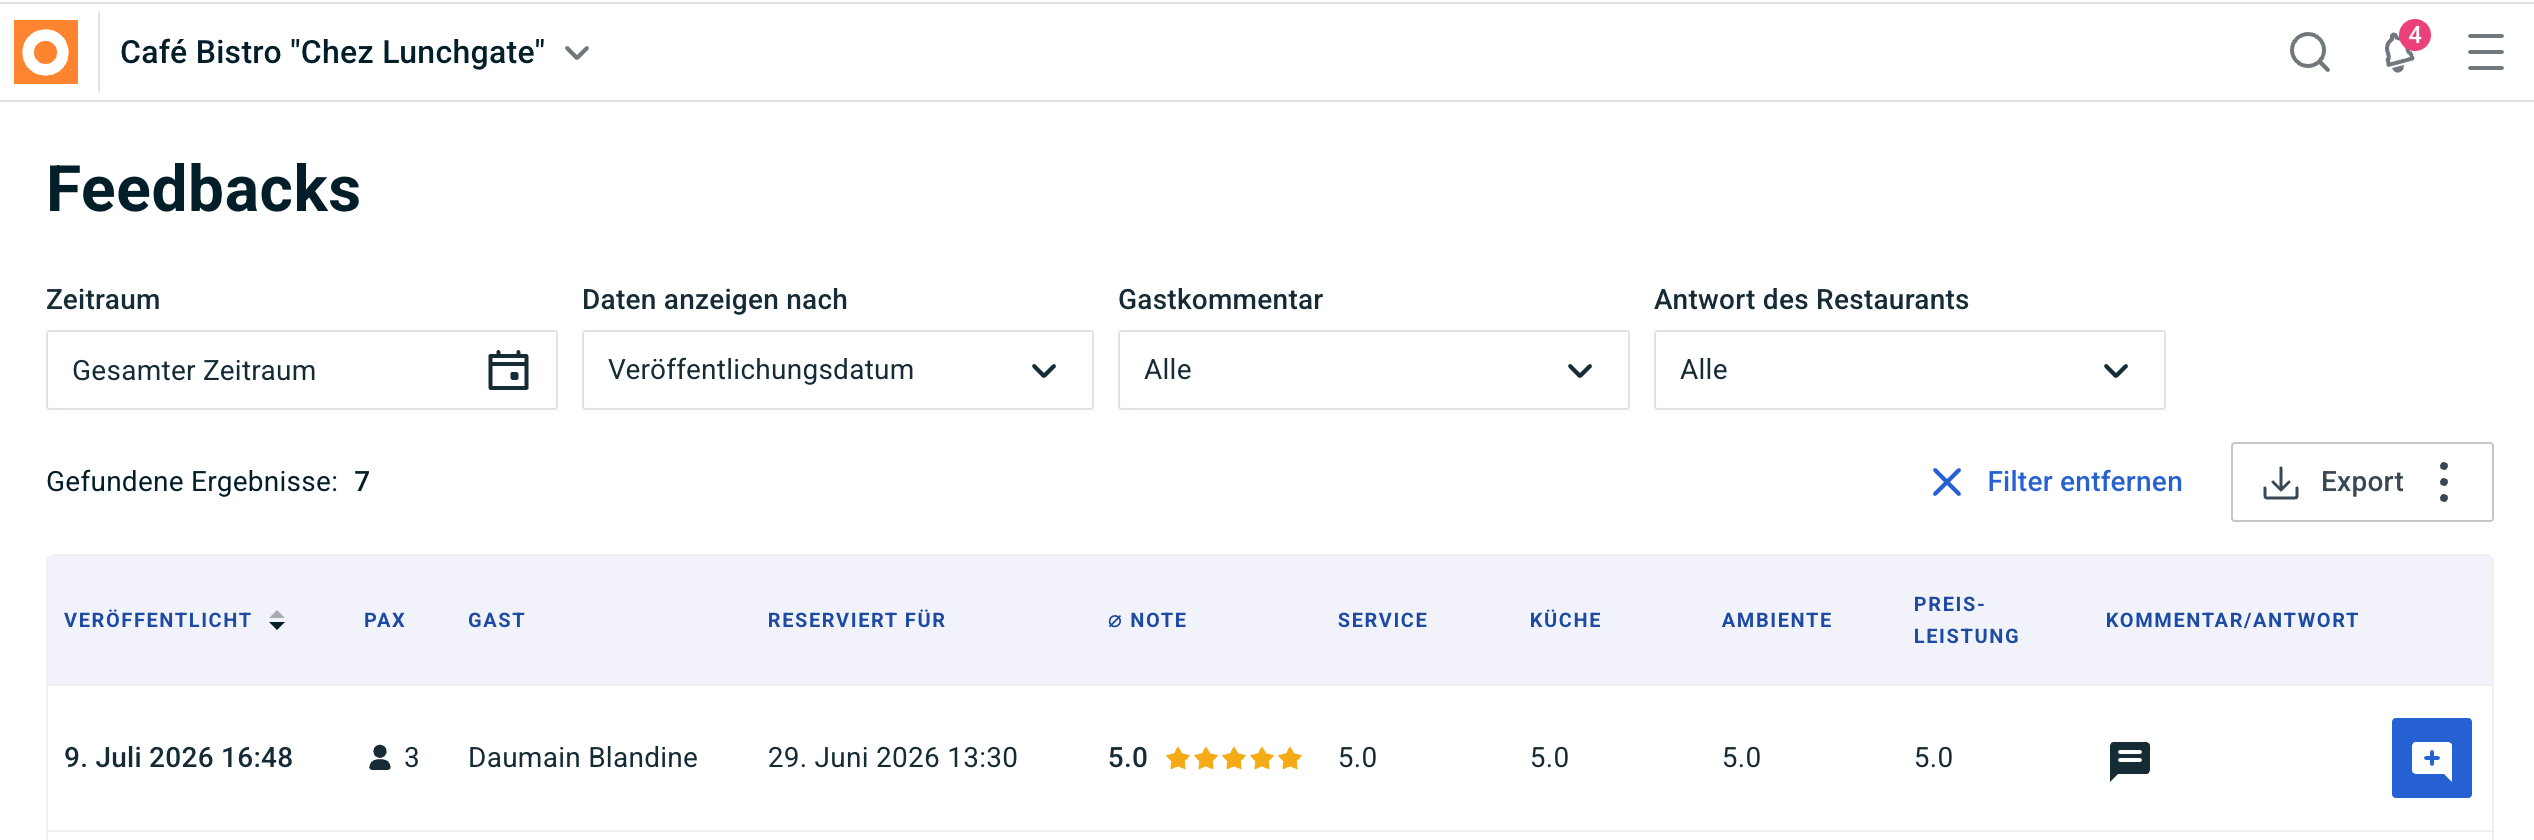
Use this feedback to:
- recognize positive feedback
- respond to criticism
- identify recurring themes
- continuously improve the guest experience
→ Go to the "Feedback in foratable" webinar (in German)
K. Insights
In the Insights section, you get an overview of key data regarding your reservations and guests.
This allows you to better identify trends and patterns in your operations.
L. Reservation views
Depending on how you prefer to work, you can switch between different views , for example:
- Visual floor plan
- tabular floor plan
- timeline
- list view
Test the different views and choose the one that works best for your service.
You're all set!
After the second training session, you will know the most important features for your daily work with your foratable reservation book.
Our tip: Start working with the system as soon as possible after onboarding. Many processes will become intuitive after just a few reservations.
Our webinars provide you with an additional good overview of foratable and show you the most important features step by step.